Wednesday, May 25, 2011

May Travels/Vanessa Shoot

Hey guys!

Wow, it's been a while. 

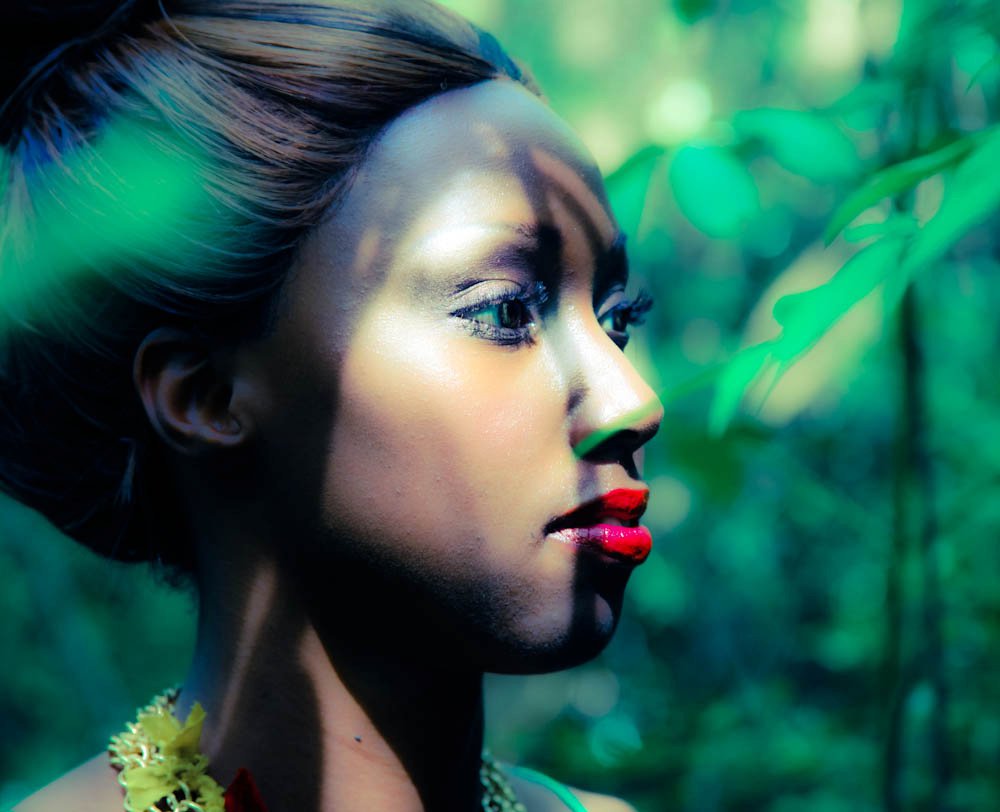
I went to NYC for The Makeup Show.  I got to experience makeup heaven and learned SO much about products, trends, and application techniques.  Very fun :)   I didn't take many pictures at the show (my hands were too full of products) but here's one from a Fall 2011 trends class.  Think dewy finish, bold brows, and deep red lips!


After NYC, I hopped on a plane to St. John to meet my mom, Uncle Doug (her brother), his wife Lynn, and my cousin Jen (and her husband--Jeff).  This was such an amazing vacation.  Every view there is picturesque.  I feel very lucky to have the opportunity to go on these trips--the gratitude has not escaped me.  Here are a few pictures from that adventure.


____________________________________________________________________

Now back to business.  I have the fun job of doing hair and makeup for a photo shoot with the beautiful Vanessa Sandler (she owns Monkees on Daniel Island--go check it out!) and photographer Mark Pelekakis.  For this shoot, she wanted a really bohemian, bronzey look.  Her hair was to be a beachy, messy wave.  Pictures turned out amazing! 


Hair:

Vanessa has naturally wavy/curly hair.  It is really fine though, but she has a lot of it.  It's gorgeous.  I used a 1 inch barrel curling iron and curled her entire head. I used Moroccan Oil Hair Spray and sprayed it all over. I teased her crown and loosly tousled the ends.  Easy-Peasy.

Makeup:

Vanessa has stunning blue eyes, so browns look GREAT on her.  She is also heavy lidded so I can put hardly anything on, and her eyes look AMAZING--I hate love her ;)  I used Urban Decay's Primer potion on her lids.  Dusted MAC Bronze all over the lid and blended MAC Corduroy into her crease.  We used a matte finish highlighter (I think I used MAC Vanilla).  Key to this look is applying eyeshadow to the lower lash line.  Completes the smokey eye and gives it an "I just slopped this on and look gorgeous" kind of feel.  I airbrushed her with Temptu Silicone base foundation in 004.  Dusted some blush (NYX Expresso), applied a nude gloss (Bobbi Brown in Nude) and voila! 

She is beautiful without makeup so my job wasn't difficult.  Hope everyone enjoyed.  Let me know if you have any questions.

Xo

Thursday, May 5, 2011

Flaw-Erasing Concealers

Hey guys! 

How is everyone?  Great, I hope.

Concealer is my best friend. I rarely leave home without it.  Since few of us have truly perfect skin, concealer is a must-have in most makeup bags.  Different from foundation and powder, concealer is thicker to better cover flaws. 

If you're using concealer to hide under eye circles, apply concealer to the inner and outer corners of the eye, and the inner corner of the bridge of the nose, gently patting it in.


FaceFirstFav:

With a blend of anti-puff ingredients, like peptides that target the fluid that causes tired-looking eyes, Chanel Life Lumiere Concealer instantly lightens dark circles to perfect the eye area. 

     
$45-chanel.com


The Benefit of Colored Concealers

Concealers come in a variety of pastel hues, and each serves a purpose.  When applying them, use only on the discolored area, followed by your regular concealer so that the color doesn't come through.  

Green: Light green concealers will cover redness in the skin, common of acne, scars, and birthmarks.

Pink: Pink shades balance out blue and gray tones, which tend to show up under eyes.

Yellow: Yellow-based concealers brighten by evening out pink tones.

Orange and Peach:  Great for darker skin, orangey shades correct blue tones under the eyes.

Purple and Blue:  Cool colors like purple and blue counteract yellowness in the skin to brighten. 

I hope this helps.  Concealer is a weapon that is commonly misused.   Use it the right way, in the correct color, and it can work WONDERS.  Have any questions?  Ask away...

Until next time....Xo 

Thursday, April 21, 2011

Spring/Summer Switcharoo

Hiiiiii dolls!

This week has been crazy and this weekend is going to be crazier.  Yesterday, I was a part of an AMAZING photo shoot for an up and coming jewelry designer: Caloju.  The jewelry is fun and colorful so I got to have fun with the makeup.  I also did the hair for this shoot.  Here's a preview:


This week I get to work with several brides for wedding day trials and this weekend I have two BIG weddings and I am working on a fun photo shoot on Easter Sunday.  It's with an amazing photographer, Jolie Connor and the theme is "heartbreak".  I can certainly relate so should be a creatively challenging and fun day. 


Alright guys, now that you know what I've been up to, I want to give you some quick information about changing up your summer makeup.  Think: Less is more.  Take your beauty cues from the ultimate authority: Mother Nature.  She changes things up; so should you!

Play with floral shades like roses and pinks; put away dark shades like wines and burgundies.  Sweep a little shimmery golden bronzer over tanned skin to accentuate your glow :)

Pink lips look great on tanned faces.  This combo also makes your teeth appear whiter.  A bright coral lipstick topped with a sheer, shimmery bronze gloss perks up your entire face, no matter what your skin tone. 

For a relaxed and pretty day time look, add a subtle wash of eye color (I like pearly whites and pinks) and a dab of lip balm.

Keep it simple.  I hope everyone has an amazing Easter weekend and enjoys their time with loved ones. 

Until next time...Xo

Friday, April 15, 2011

MAC purchases

Hey loves!

YAY it's Friday!  I'm ready for a fun-filled weekend. I have my first Saturday off in months so I am going to redecorate my spare bedroom--exciting stuff ;)

Ok, let's get down to business.  If you had $100 to spend at MAC, what would you get?  Let's face it, I put A LOT of makeup suggestions on here and you would go broke purchasing every item I love.  I decided to put together a list of items I would purchase with a $100 spending limit.  This is affordable for everyone, you will LOVE the products, and thank me later :)  I hope this helps!


Fix + Spray


Love, Love, Love!  I use it everyday after I finish my makeup to give my skin that youthful glow.   You can also mix it with pigments to get a wet eyeshadow look, or spray on your sponge before applying foundation.

Price: $19


217 Brush


My all-time favorite brush.  I love it because it’s stiff and dome shaped which is great for smoking out eyeshadows, blending colors in the crease, or feathering colors together.  You can even use it to apply cream products to the lid as it gives a soft application.  This brush is a staple in my everyday kit!


Price: $22.50


219 Brush


This is another favorite brush of mine that I use every day!  It’s the perfect brush for smudging eyeshadow along the lashline, defining the crease, or creating the perfect “outer V”.  

Price: $24.50

Expensive Pink Eyeshadow


MAC has well over 100 eyeshadows, and most all of them are pretty.  But… this one is very unique to me and looks great on just about anyone!  It’s a medium pink color that works well for an everyday look, and since it is a warm pink, it is flattering.  I can’t think of any other brands that have this exact color.


Price: $11.00  (for the refill pan)

Amber Lights Eyeshadow


This is another gorgeous color that looks good on everyone, and I mean EVERYONE.  I haven’t found a client yet that this doesn’t look great on.  It’s a warm golden bronze color that can be toned down for an everyday look, or paired with a black shadow for a fantastic date night look.   There are some brands that have colors close to this, but it’s not quite the same texture or richly pigmented like this one!

Price: $11.00

Blacktrack Fluidline


I am a 100% addict to gel or cream eyeliners.  They glide easily, last a long time, are rich in color, and are easy to apply.  I like this MAC one since the gel formula doesn’t dry out and look cakey on my eyes.  I love to dip an eyeliner pencil in it to line my waterline, or use a bent liner brush for that perfect winged liner.  You can choose from 6 colors of fluidlines, but the black one can be used everyday.


Price: $15.00


Tuesday, April 12, 2011

Q & A

Hey loves!

So another week has gone by in my little world of beauty & makeup and what an action packed time it’s been!  Weddings, photo shoots, and the salon, it's hard to consider it work when I love it so much.  I've had a lot of questions so I'm going to take a few and answer them now.

Q:  How can I be more adventurous with my makeup? 

A:  First, accept that most of us can only wear colors within a fairly narrow spectrum.  The trick is to find which shades flatter you, be they browns, pinks, or apricots, and then experiment with new products within this range when you feel like a change.

Q:  How do I find the right concealer for me?

A:  Using the wrong shade will highlight rather than hide your flaws, so follow the basic rules: Concealer with a greenish tinge will hide redness; a blue tone will complement fair skin; a yellow concealer is good for dark or uneven skin; while a pinky color will illuminate a dull complexion.

Q:  When it comes to skin, is matte always better?

A:  Not necessarily.  It depends on your skin type.  If you have oily skin, matte foundation will help control oil. Dry skin does not need this formula.  To get the fresh-faced, dewy look that is popular at the moment, try a foundation or concealer with light-reflecting pigments.  It's particularly flattering on older sins and will stop you from looking caked.


Q: Where should I apply highlighter?

A:  Under your eyebrows, down the middle of your nose, just about your cupid's bow and in the semicircle from your outer eye along the line of your cheekbone.  Avoid blemishes at all costs as you don't want to highlight them too.  

_______________________________________________________________

I appreciate the questions.  Keep them coming.  Hope everyone has a great day!

Xo

Tuesday, April 5, 2011

What I've Been Up To

Hello Lovelies :)

Well, like I said in my previous blog, I've been super busy with work.  I want to share some of the make-up I've done on recent shoots with photographer Jason Benjamin.  This is for the e-sy-lum 6 month calendar. Here they are...Hope you enjoy!


I am lucky to have worked with such talent.  They challenge me and keep me growing :)  Hope everyone has a great week!

Xo

Tuesday, March 29, 2011

Ten-Step Guide to Perfect Makeup

Hello everyone!

Wow, life has been pretty crazy lately.  I have been so busy with work, family, and trying to maintain some type of social life.  I am going to post more often...even if it's just quick tips.   Hope everyone is doing and feeling great!

In my mind, makeup is simple.  When you  know how to apply it, it should only take five to ten minutes.  Practice is the key.

Step 1: Concealer

Under eye concealer should be one to two shades lighter than your skin tone.  If the concealer looks ashy, it's too light.  If it looks yellow, it's too dark. 

Applying concealer on the spot next to the inner corner of the eye will open up your eyes and give you a fresh, bright-eyed look.


Step 2:  Foundation

To find the perfect shade, swatch a few shades on the side of the face and forehead and check the colors in natural light.  The shade that disappears is the right one.

Use a brush, sponge or fingers to apply.


I have two shades of foundation--one for winter months and one for summer.  Blend the two for spring and fall :)

*For a sheer, casual alternative to foundation, use a tinted moisturizer to even out skin tone.

Step 3:  Powder

Dusting a setting powder over the face will ensure long-lasting results.

I love Makeup Forever High Definition setting powder.


Step 4:  Blush

Smile and apply a natural shade of blush on the apples of the cheeks.  Blend up toward the hairline, then downward to soften the color.

For an extra glow, add a luminous highlighter on top.  Dot three dots on top of your blush and blend.  I love High Beam by Benefit.


To add a warm tint to skin, use a bronzer on areas where the sun normally hits the face--cheeks, forehead, nose, and chin.

Step 5:  Lipstick


Start with clean, smooth lips.

Neutral lipstick shades and sheer formulas can be applied directly from the tube.  Use a lip brush to apply darker, or brighter colors, which require precise application.

Step 6:  Lip Liner


To achieve natural-looking definition and to keep color from feathering, line lips with a lip liner AFTER applying lip color.  Use a lip brush to soften and blend any hard edges. 

Step 7:  Brows

Define brows using shadow or pencil in the color of your eyebrows.  Revlon makes a great pencil/gel combo.  Try it out!


Step 8:  Eye Shadow

Sweep a light eye shadow color from the lash line to the brow bone.  I like NYX-nude

Dust a medium eye shadow color on the lower lid, up to the crease.

Apply contour color if needed to add depth to eye. 


Step 9:  Eyeliner

Line the upper lash line with a dark shadow color. You can apply damp or dry.

After lining the upper lash line, look straight ahead to see if there are any gaps that need to be filled in.


Step 10:  Mascara

When applying mascara, hold the wand parallel to the floor and brush from the base of the lashes to the tips.  Roll the wand as you go to separate the lashes and avoid clumps.  Always apply two to three coats.

If you choose to curl lashes, do so before applying mascara.

_____________________________________________________________


Remember,  this is for a quick, day look. Most of the time for a night look (with heavier eyeshadow), I do eyes first so that I can wipe off any excess eyeshadow that will fall.

Make it your own, practice, and have FUN!

Please keep the questions coming--they are the inspiration for my posts.  Have a great week.

Xo

Tuesday, March 8, 2011

Lipstick Trend

Hey everyone!

Lipsticks come in all shapes and sizes.  One particular trend that I've seen a lot in spring forecasts is the "Matte" finish.  Personally, I've always been a fan.  Matte lipstick requires some rules of application; so, allow me :)

_______________________________________________________________

1.  Exfoliate

With a matte finish, lips are not being hydrated as well as with a gloss, so they show flakes and dryness.  Scrubbing your lips will allow for a smooth canvas to apply the stick.  I recommend The Lip Scrub. You can buy this at Blue Mercury.

    
Retails for $25

Using a washcloth or toothbrush to exfoliate lips works as a quick option. 


2.  Hydrate

Follow up the exfoliation by applying lip balm.  Blot a few times after to make sure you do not have too much on!  My favorite is the Burt's Bees chapstick.

Retails for $5


3.  Color

After blotting excess lip balm,  now it's time to apply the color!  Pick a color that works with your skin tone and is appropriate for the season.  A pale pink or nude always make a great option. 

Nars Pure Matte. $25
Sonua Kashuk for Target.  Velvety Matte Lip Pencil. $7


Loving this trend.  Let me know if you have any questions.  Thanks for reading :)

Xo

Wednesday, March 2, 2011

Self-Tanner Review

Hey FaceFirst Followers!

I recently tried a new self-tanner and wanted to give you my breakdown on it.  It's Victoria's Secret Beach Sexy Gradual Tan Moisturizer SPF15.

Retail $12


Vicoria's Secret Daily Glow is the updated version of VS's last gradual tanner, Bare Bronze Daily Glow. That one was a favorite of mine for both scent and effectiveness, so I was curious to try the new version and see if anything had changed.

Well, we know there's now SPF 15 in it -- that's a plus. And the scent is the same (praise the beauty gods!). I love the smell of this tanner; it's beachy, tropical and coconutty.  This new Beach Sexy gets you tan, but not as quickly as the old one (it comes in only one concentration).

Overall, though, a great pick!  Or if you're just looking for a great gradual self tanner that smells fabulous and protects you from the sun's rays, go for it!

Hope this helps you achieve a sun-kissed glow without damaging your skin in the sun!

Keep the questions coming guys.  Thanks for reading.  Until next time...

Xo